How To Draw A Cartoon Rocket Easily Step by Step
How To Draw A Cartoon Rocket Easily Step by Step. Numerous people long for the supernatural occurrences of room travel, and it is easy to see why! Space tends to be an unprecedented dark that we have barely any experience with, paying little heed to unbelievable development leaps in recent numerous years.
Also, check our Printable Tiger Coloring Pages.
It will, generally, be heaps of silliness imagining what exploring the universe may be like, and sorting out some way to draw a Cartoon rocket is a mind-boggling technique for envisioning what it very well may be like! This guide will take you through how you can have on a ride arranging your unique incredible rocket close by some inventive space establishments.
So plan a creative excursion as we start this step-by-step guide on the most capable technique to draw a Cartoon rocket in just 6 horseplay and straightforward undertakings!
How To Draw A Cartoon Rocket
Step 1
To begin this Cartoon rocket drawing, we will first draw the rocket’s tip. This will have a three-sided shape that resembles the condition of a tortilla chip. We would propose not including a ruler for this shape, as you will see that the edges of the shape are fairly twisted.
It will have three sharp tips, and how this shape is arranged is huge, as we will relate the rest of the rocket to it in light of a specific objective. When this triangle is drawn, you’re all set for stage 2 of the assistant!
Step 2
In this second step of our helper on the most capable strategy to draw a Cartoon rocket, we will draw the rocket’s body. This will connect with the base edge of the three-sided tip from the underlying step.
The rocket’s body will be long and twisted as it connects from the tip. The sides will twist inwards to shape a base that is overwhelmingly the most slim piece of the drawing. There won’t be any extra nuances or parts affixed to it for the present, so at whatever point it’s drawn, we can forge ahead toward a couple of additional nuances in the resulting stages.
Step 3
This rocket wouldn’t go anywhere without a drive or the like,, soill draw in these supporters in this step. Each advertiser will be associated with a daring squared region, and you can start with these. This time, we would propose including a ruler for these portions.
There are two clarifications behind this: first, we keep up with the fact that the lines should be very straight. Besides, you can use the ruler to guarantee these portions are of identical length. Then, we will add the advertisers. These are reasonably rocket-shaped, as they are defined for specific twisted boundaries that are complete in sharp tips. Clean them off by adding two twisted lines onto each one, and we can continue!
Step 4
By and by, we can add a couple of nuances like windows and other more humble contacts to your Cartoon rocket drawing. Before we draw the window, there will be a twisted line across the rocket under the sharp tip.
Then, you can draw a medium-sized circle under that line and a more unassuming circle inside it. Then, at that point, characterize two twisted limits near the groundwork of the rocket. Once these are drawn, we will add a couple of vertical straight lines across this part.
We will do a similar effect on the rocket’s advertisers, except the vertical lines will be under a lone line rather than two. Then, we’re ready for a couple of last nuances and parts in the resulting phase of the helper!
Step 5
We have several extra nuances to add before mixing it up in the last step of this assistant on the most capable technique to draw a Cartoon rocket. Our last nuances are clear, yet you will, get to add your special part in like manner! For our own, we will add a couple of spots across various portions of the rocket.
These will go about as endlessly darts on the rocket, and they will clean it off wonderfully. Then adding a couple of subtleties is your opportunity! You could draw some fire from the underpinning of the rocket for one thought, and another is drawn an establishment.
Doing this would be an extraordinary technique for using your innovative brain to make stunning space scenes.
Step 6
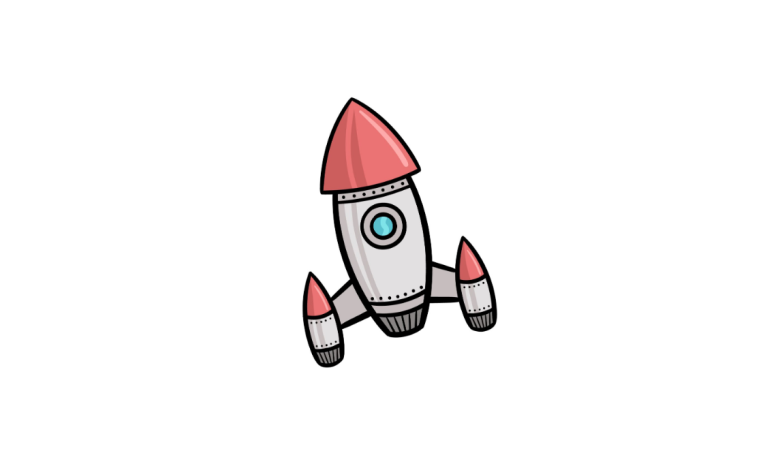
By and by, we can finish with some concealing tomfoolery in this last step of this educational activity. In our reference picture, we showed you one of the various ways that you can move toward concealing this grand rocket. We included various shades of red for the tipped region of the rocket and the backers. Then, we went for specific metallic grays for the rest of the areas.
These assortments are thoughts that you could test, yet this is your chance to display what other astounding considerations you have for the picture!
Your Cartoon Rocket Drawing is Finished!